
- Step 1. Azure AD – Register ServiceNow
- Step 2. ServiceNow – Enable Azure AD Integration
- Step 3. Configure Redirect URI in Azure
- Step 4. Azure AD – Assign Users
- Step 5. ServiceNow – Test Connection
- Optional: Step 6. User Provisioning (SCIM)
We are essentially setting up SSO (Single Sign-On) and SCIM (automatic user provisioning).
Here are the structured steps:
Step 1. Azure AD – Register ServiceNow
We need to register an app:
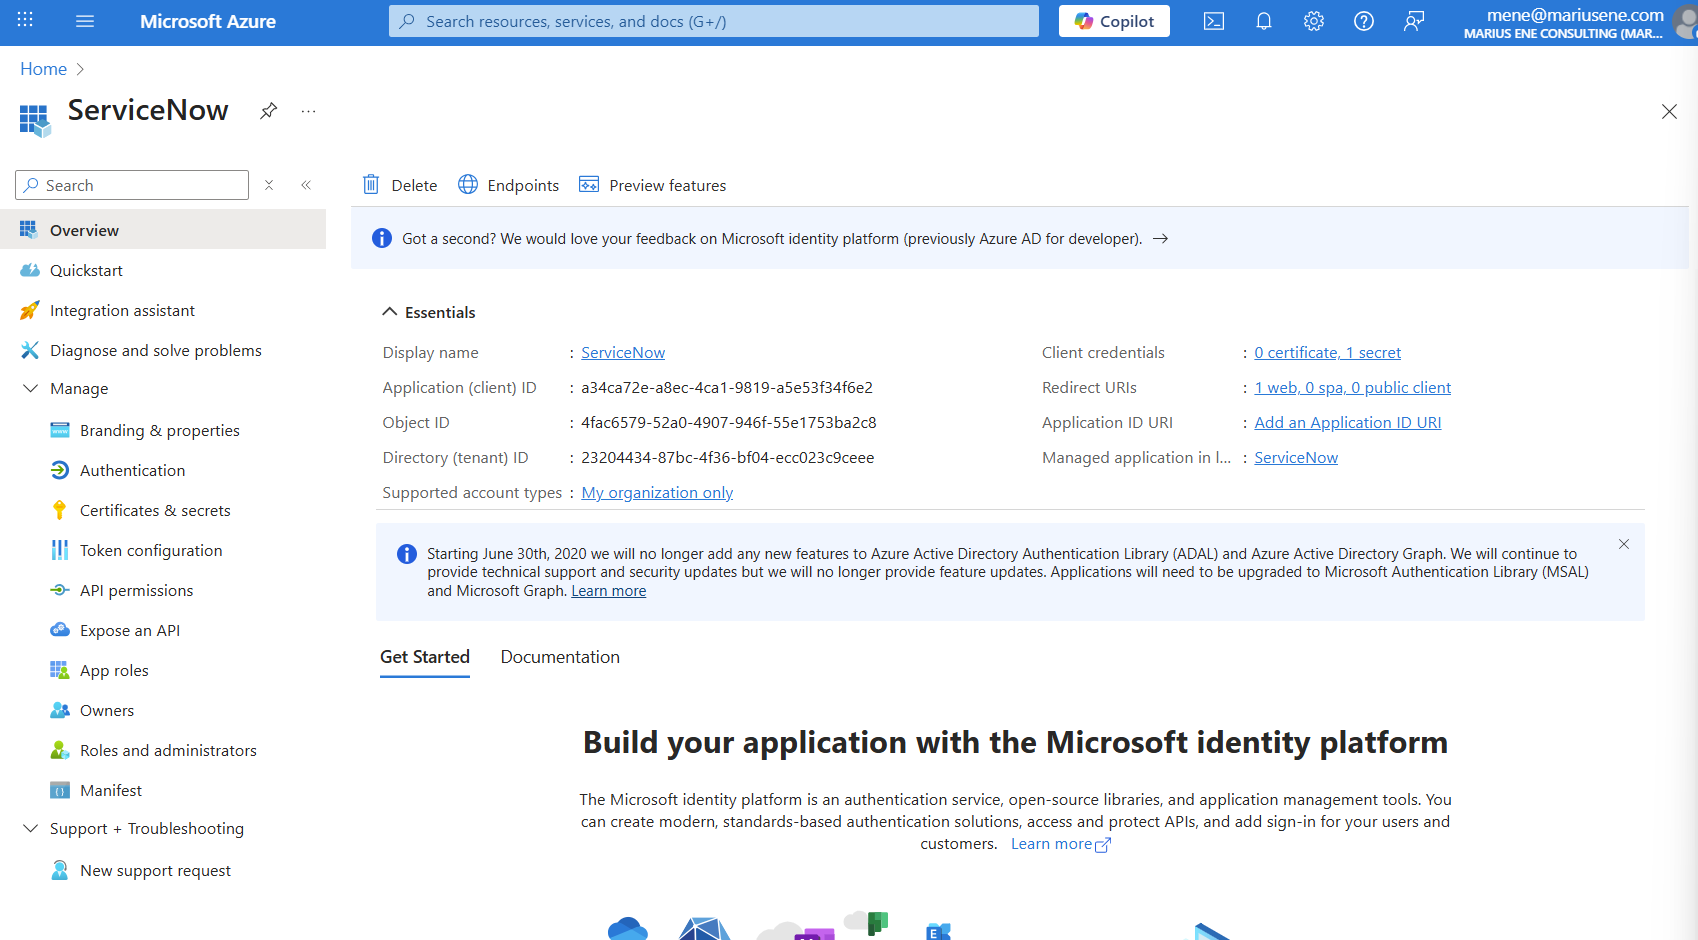
- App registered → we have:
- Application (client) ID
- Directory (tenant) ID
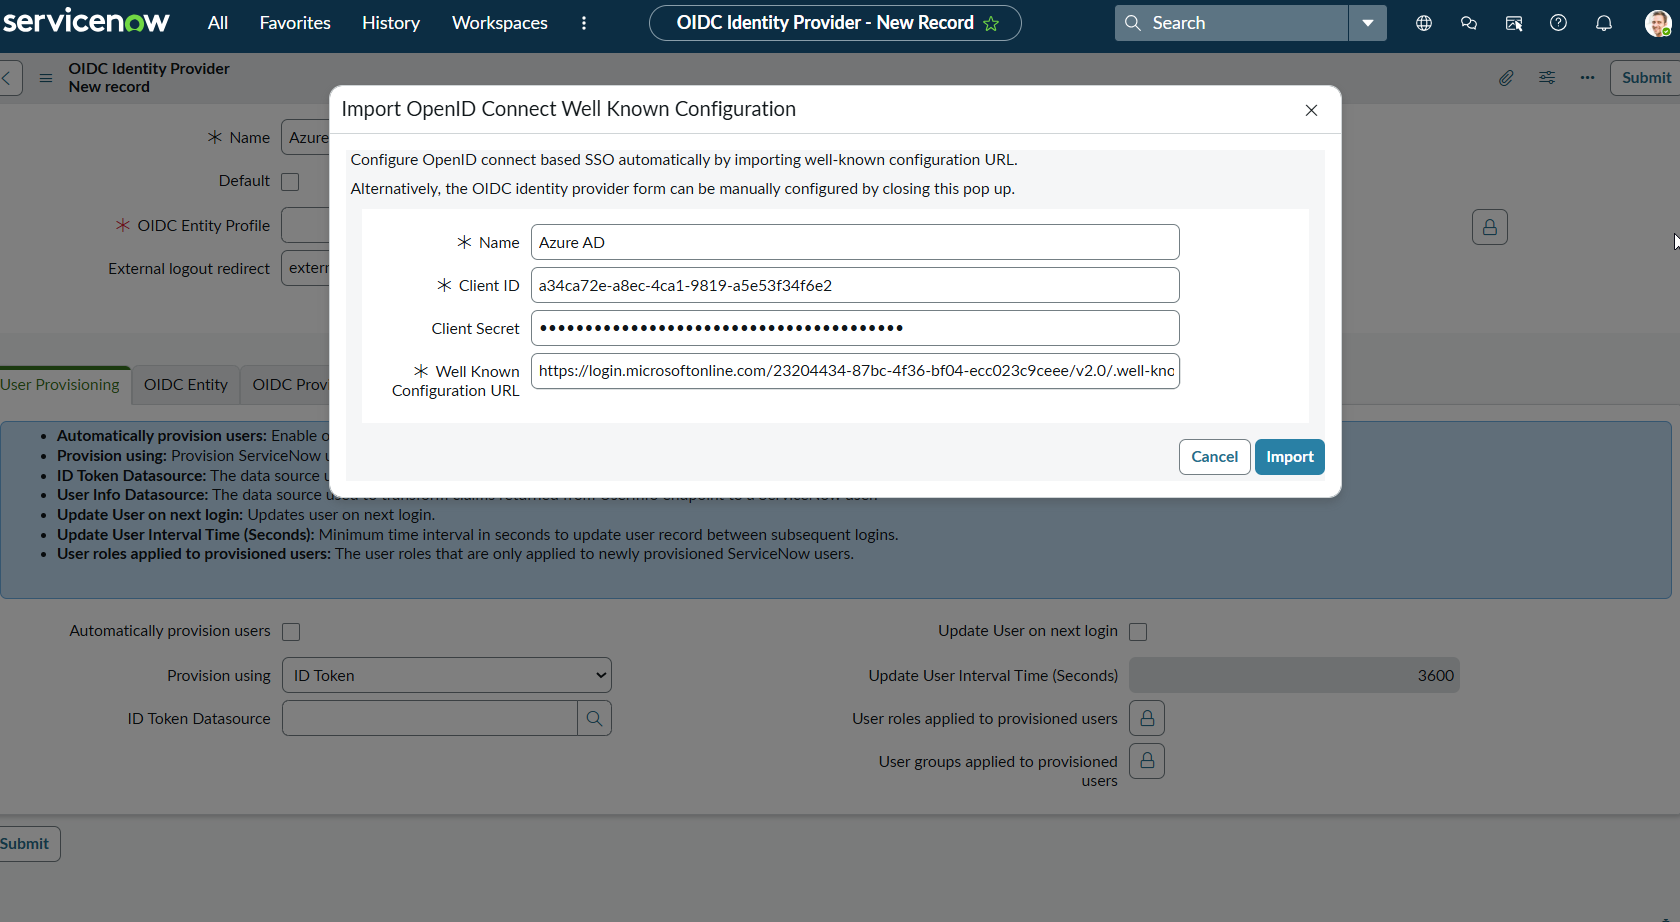
We need to generate a secret:
- In the Azure portal → Certificates & secrets → New client secret.
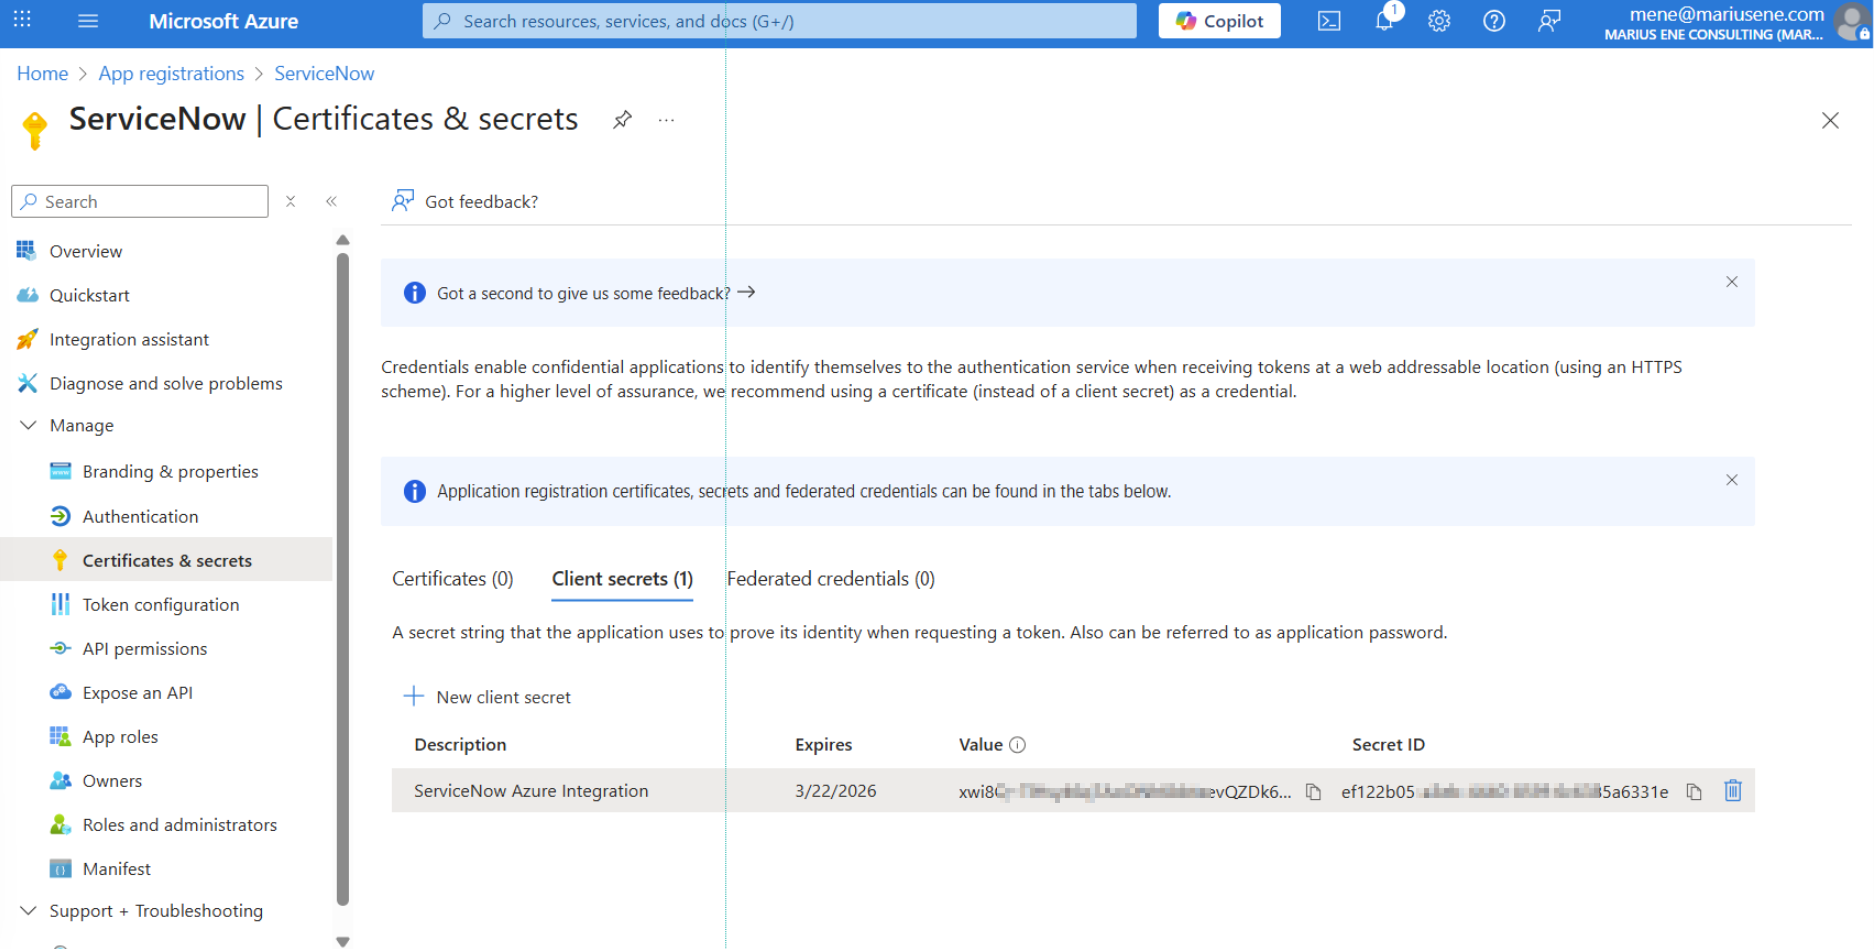
- Copy and store the secret value (you’ll need it in ServiceNow).
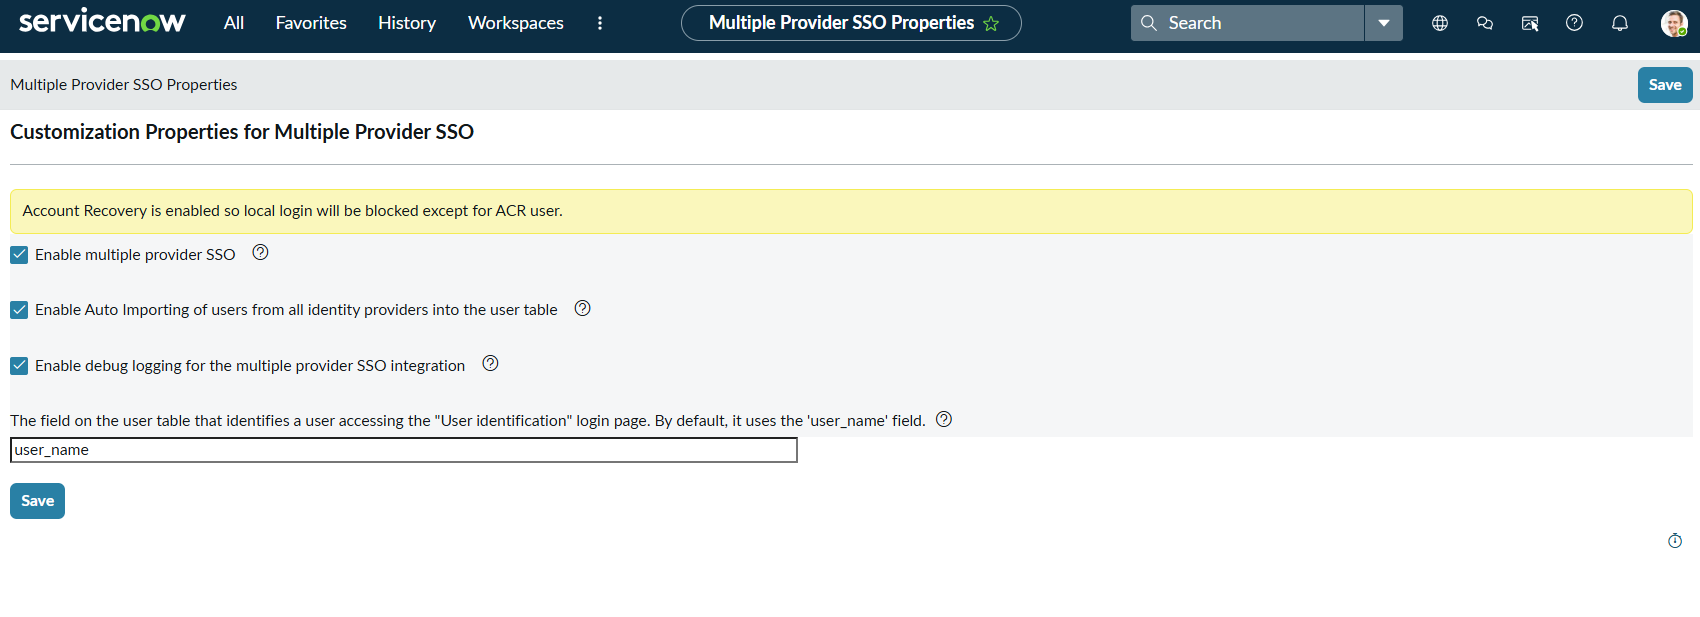
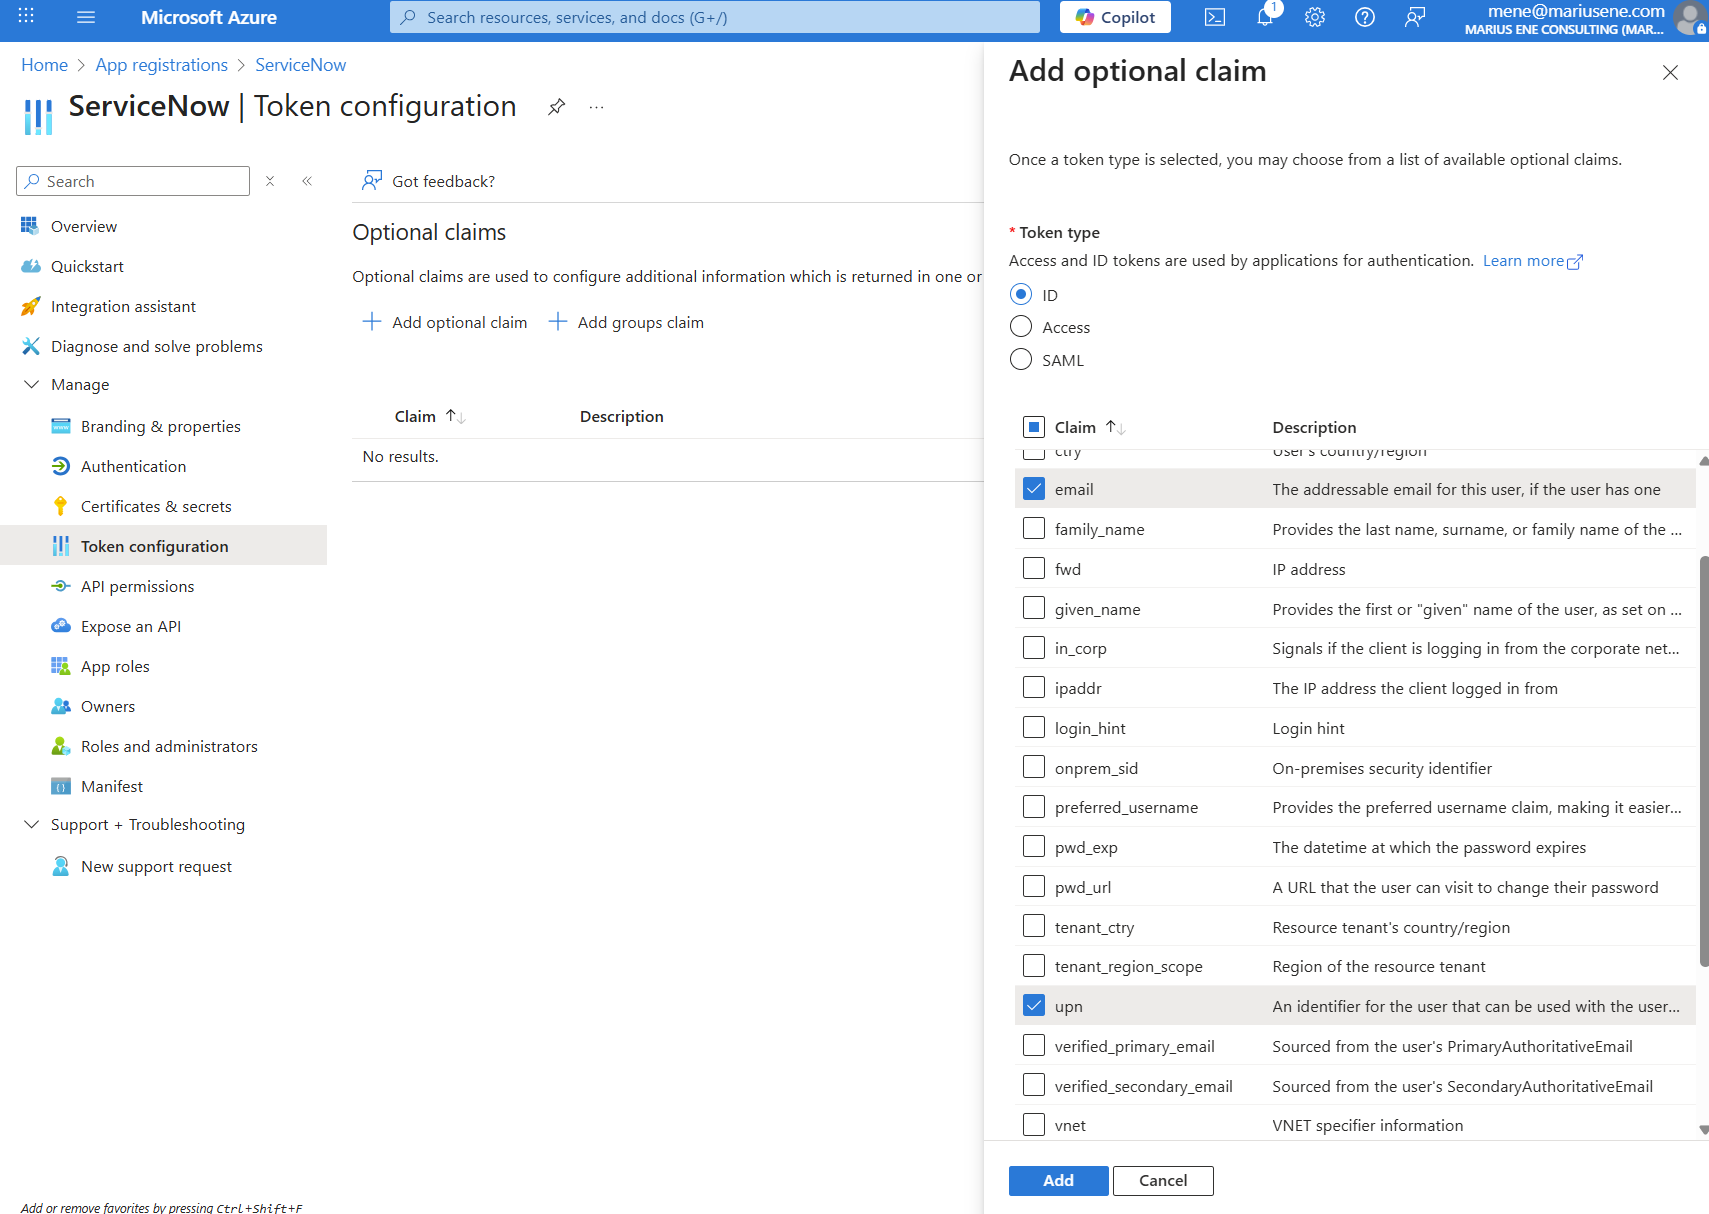
Step 2. ServiceNow – Enable Azure AD Integration
- Log into the ServiceNow instance
- Go to System OAuth > Application Registry.
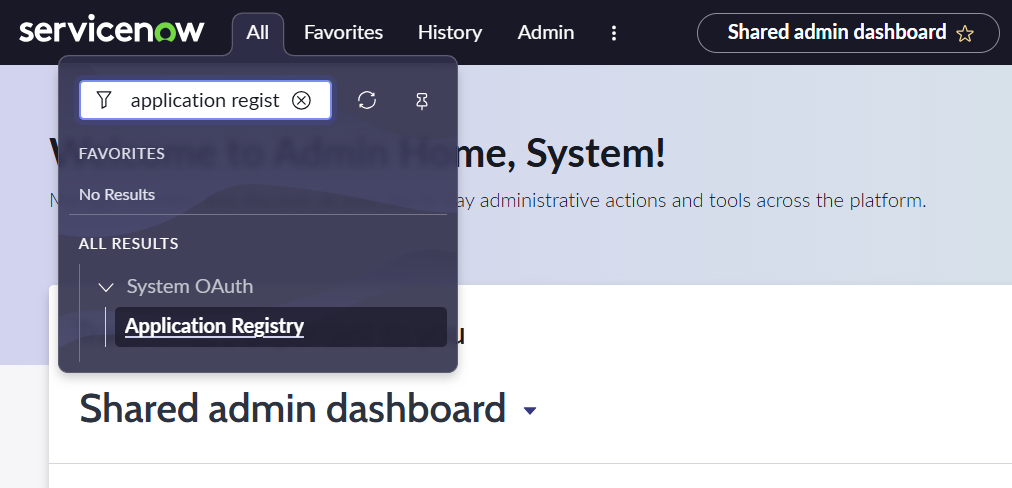
- Click New → choose Connect to a third-party OAuth Provider.

- Replace
<tenant_id>with your Directory (tenant) ID.
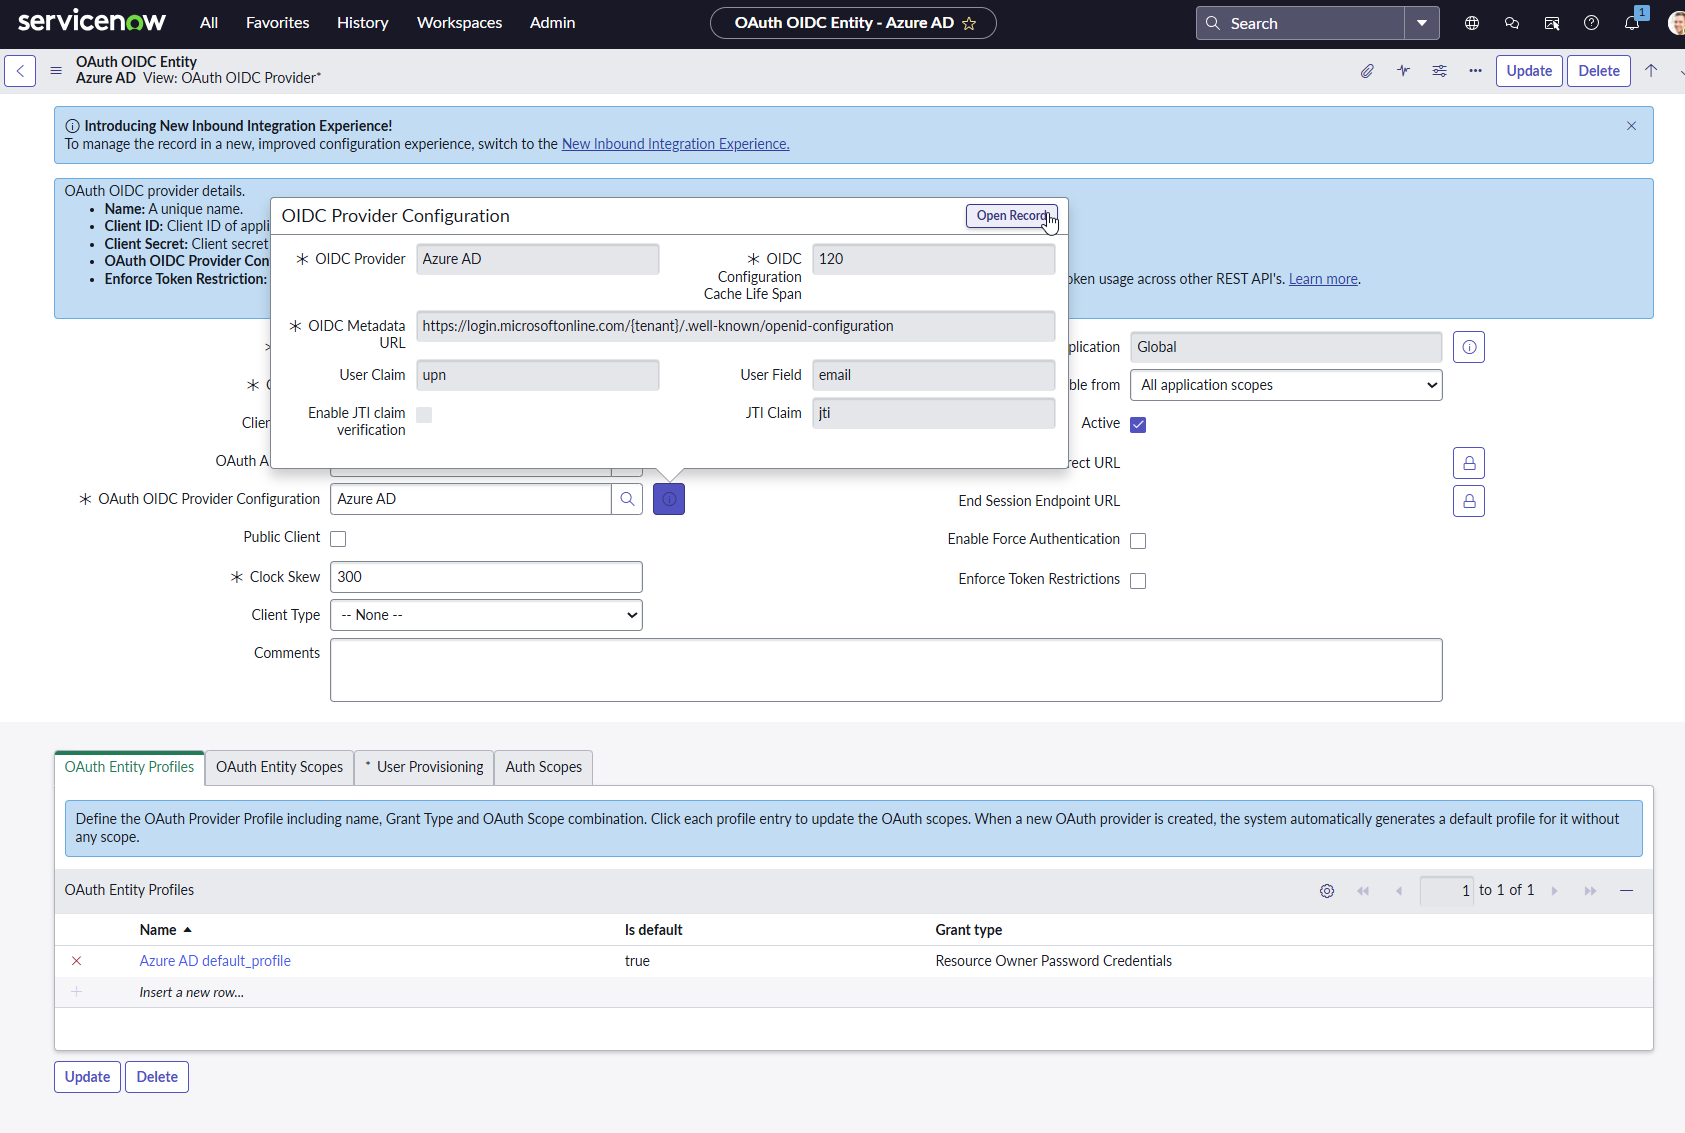
User roles applied to provisioned users.


Update.
Step 3. Configure Redirect URI in Azure
- In Azure portal, open the ServiceNow app, Authentication.
- Add a redirect URI:

Click Save.
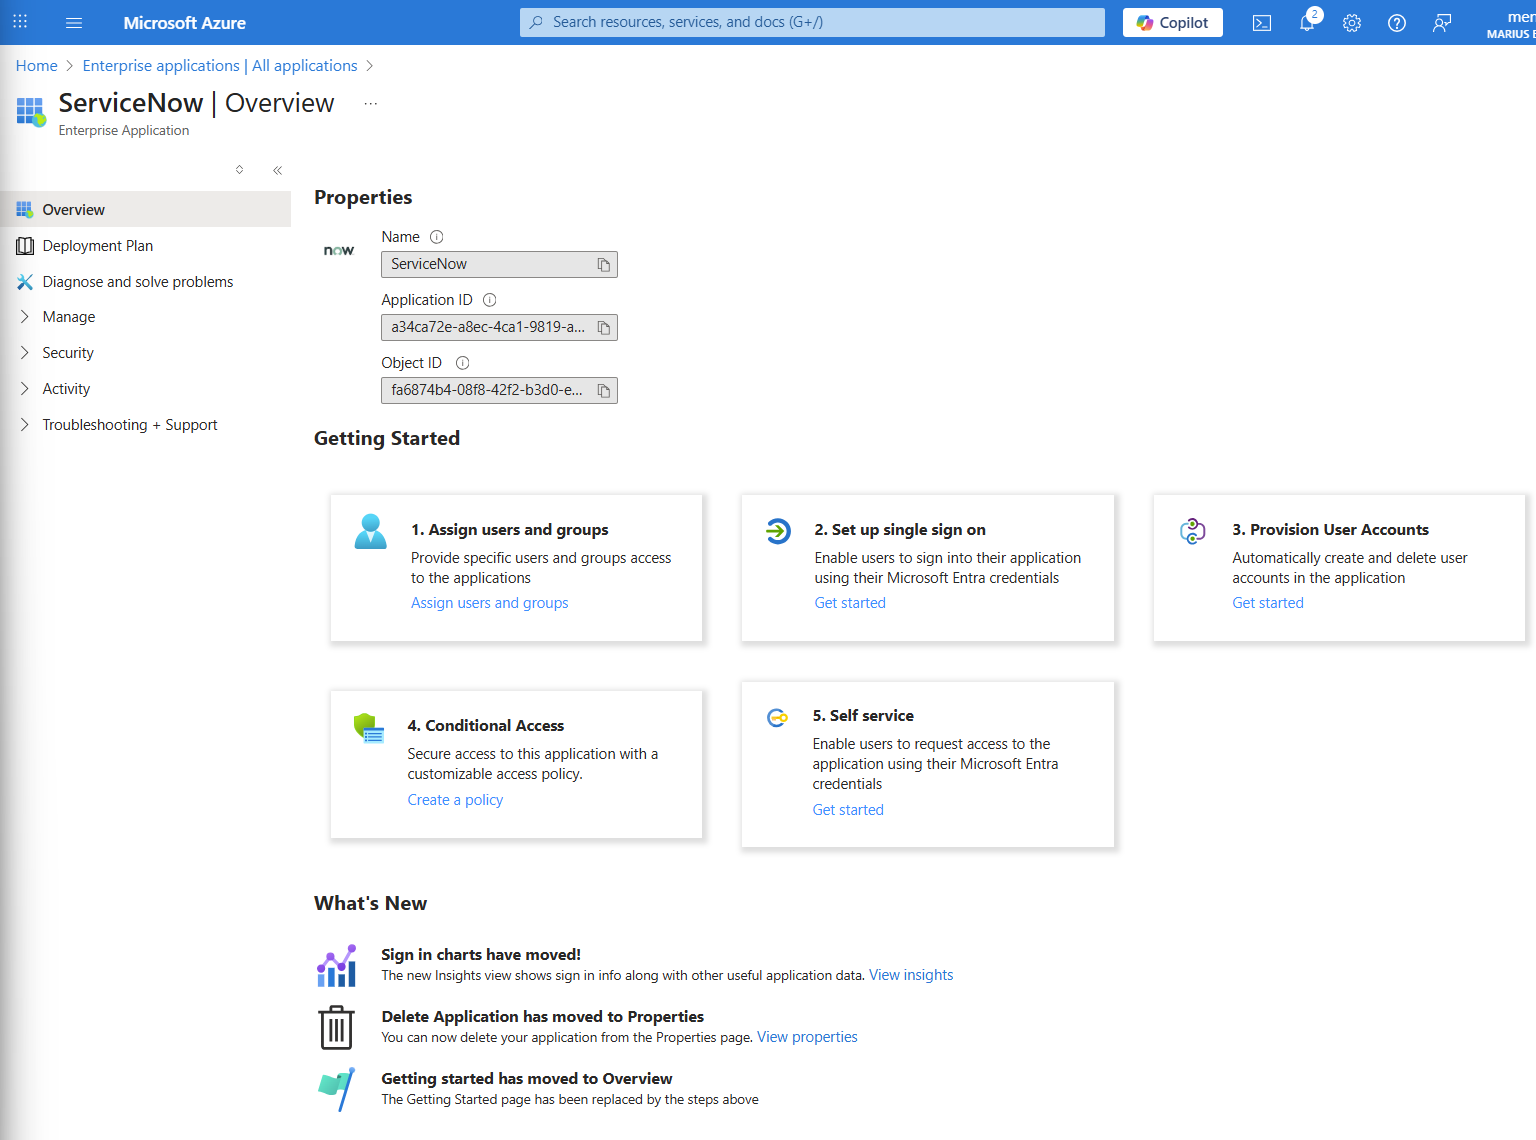
Step 4. Azure AD – Assign Users
- Go to Azure AD → Enterprise applications → your ServiceNow app.
- Under Users and groups, assign users who should have access.


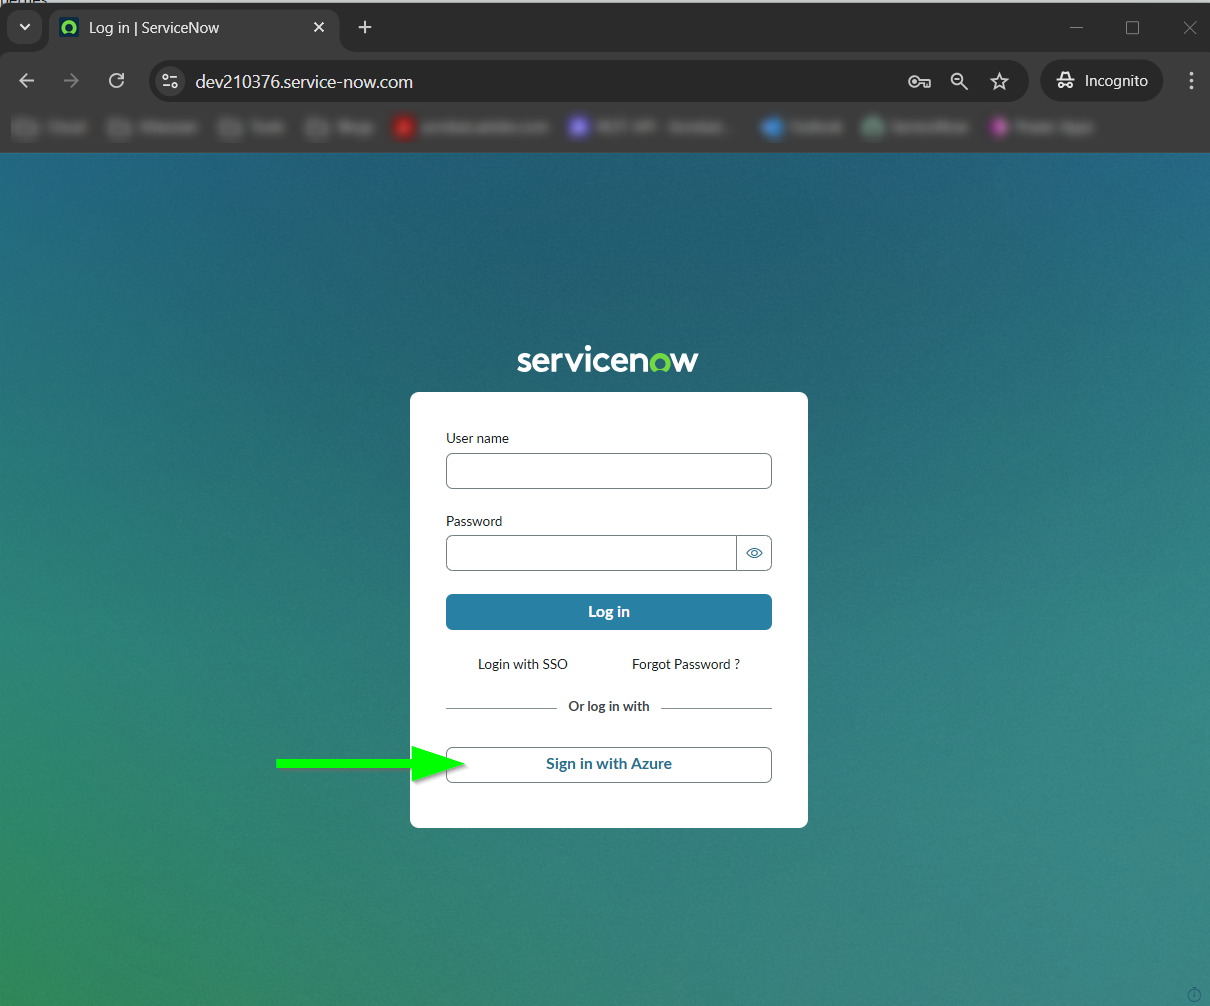
Step 5. ServiceNow – Test Connection
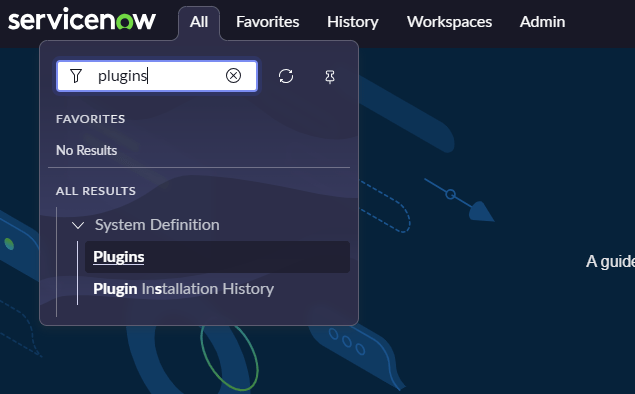
- In ServiceNow, enable the SSO plugin.


After installing navigate to Multi-Provider SSO.
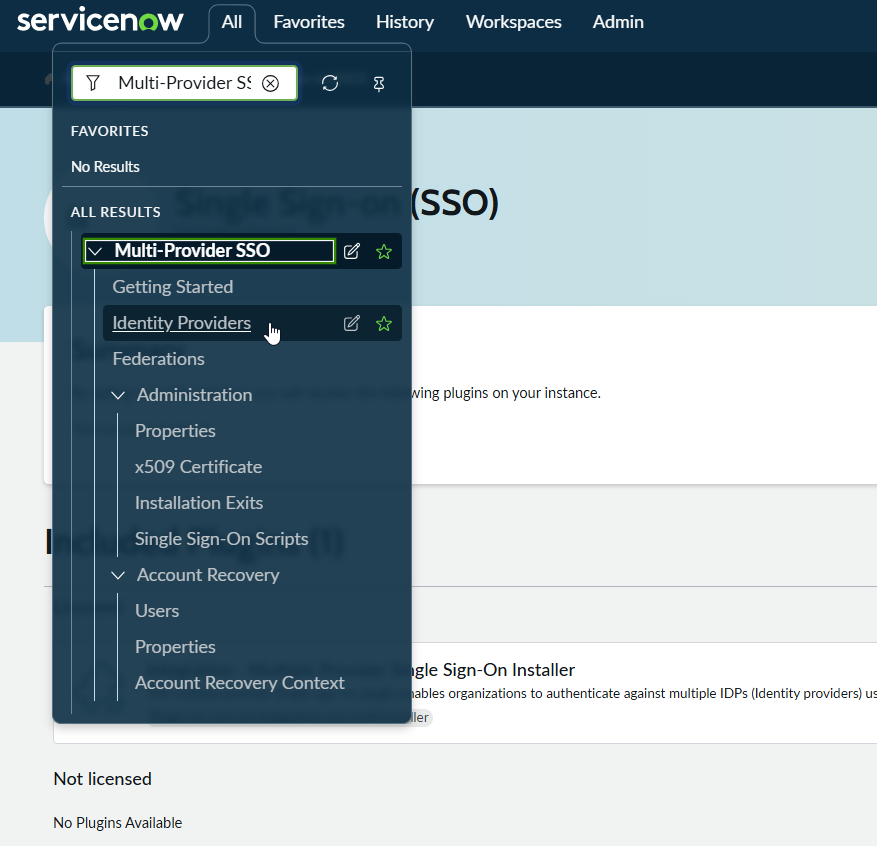
Select OIDC.


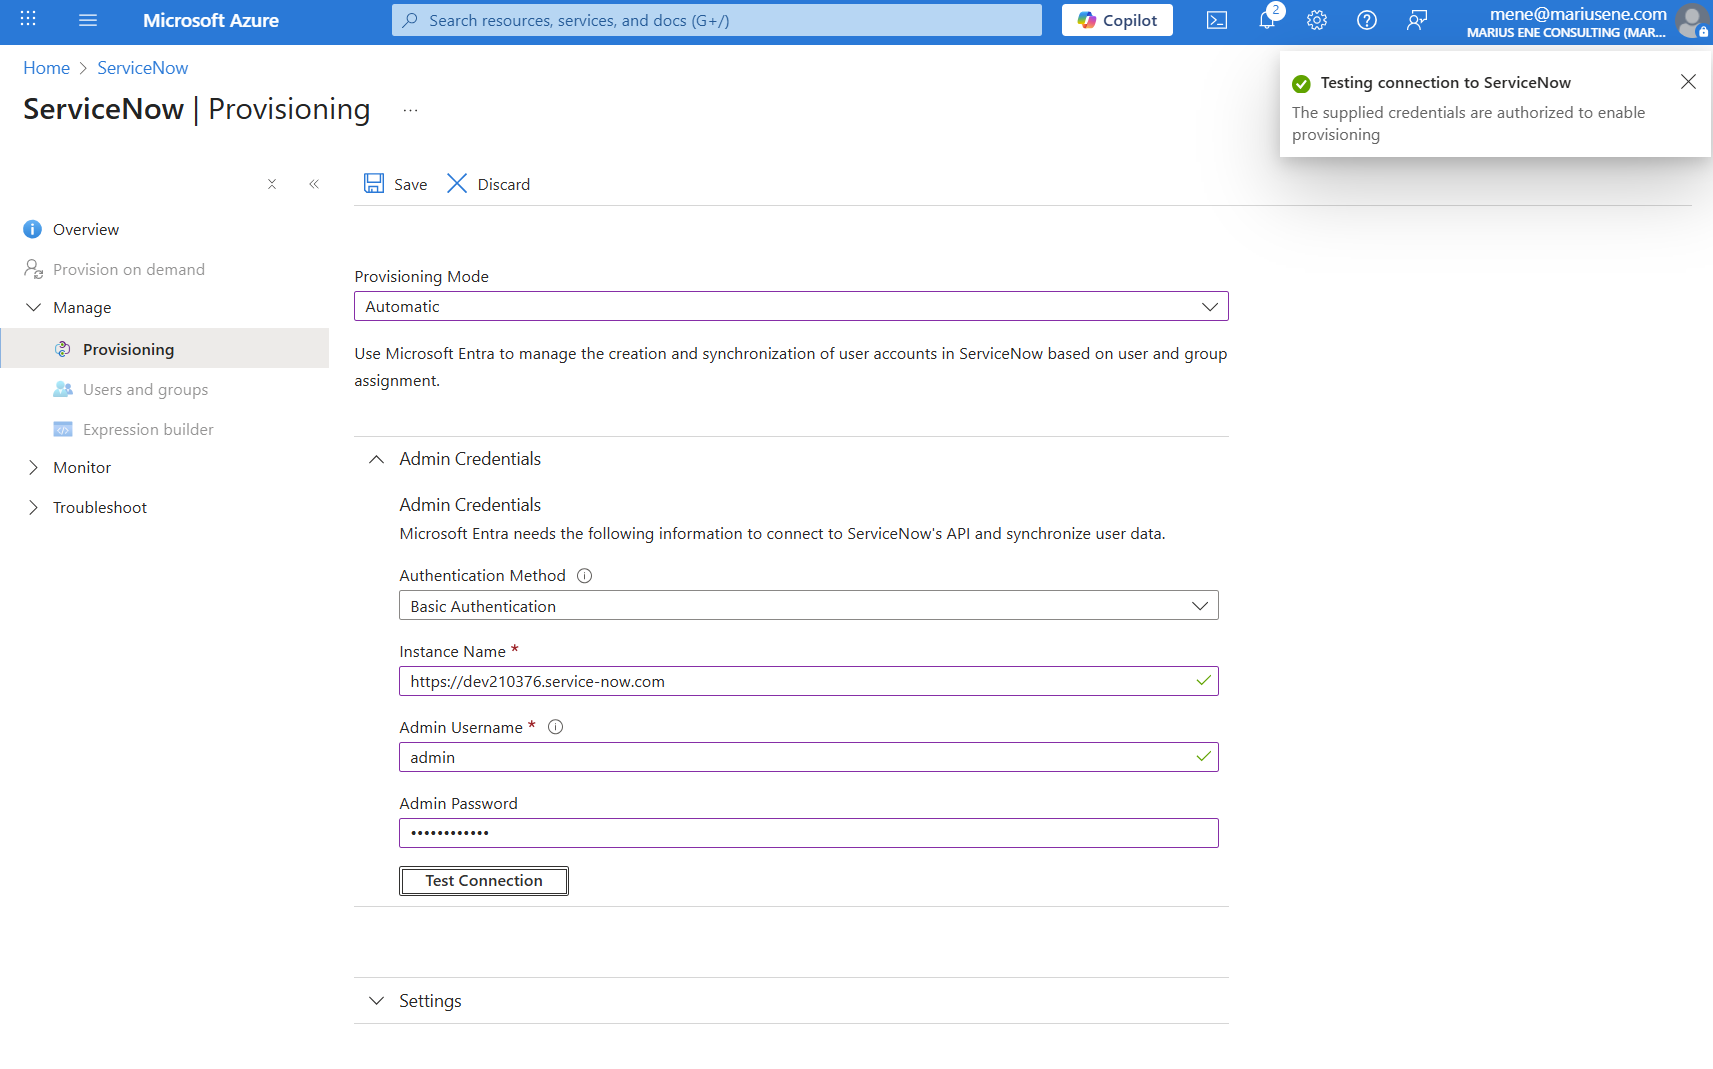
Optional: Step 6. User Provisioning (SCIM)
If you also want Azure AD to automatically create/update users in ServiceNow:
- In Azure → Enterprise Applications > ServiceNow > Provisioning.
- Set provisioning mode to Automatic.
- Enter ServiceNow tenant URL:
https://<your-instance>.service-now.com - Enter ServiceNow admin username/password.
- Test connection → then enable.
